Troy-Bilt TB475SS Trimmer
Line unwinds when run

Problem is that when pressing the trigger the line will just run out around the outer spool.

First steps are to cut the mangled lines and remove the bump button and the inner spool.

IMG_7422

Pushing down on the white plunger and using a small screwdriver we can remove the e-clip:

IMG_7425

We can then remove the plunger and the spring. A retainer can then be removed using a small snap ring plier (thin tips) and the slider can come out.

In our case the slider is damaged, the tab that runs against the spring is broken.

IMG_7432

And we can see that one spring is missing:

IMG_7428

Replacing the slider with a new one and adding the missing spring fixes the problem.

1998 Mitsubishi Mirage
Stopped while driving, no start

Car is a 1998 Mitsubishi Mirage LS.

Driving down the highway the engine just died. After stopping in a safe place the car would not start. I had it towed back home, away from the noise of the highway and noticed that it did sound good when I tried to start it.

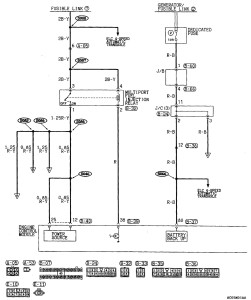
We thought that maybe fuel did not get to the engine, looked for a kill switch that might have tripped and looked at the electrical diagram for the fuel delivery and electrical system.

elect_fuelpump

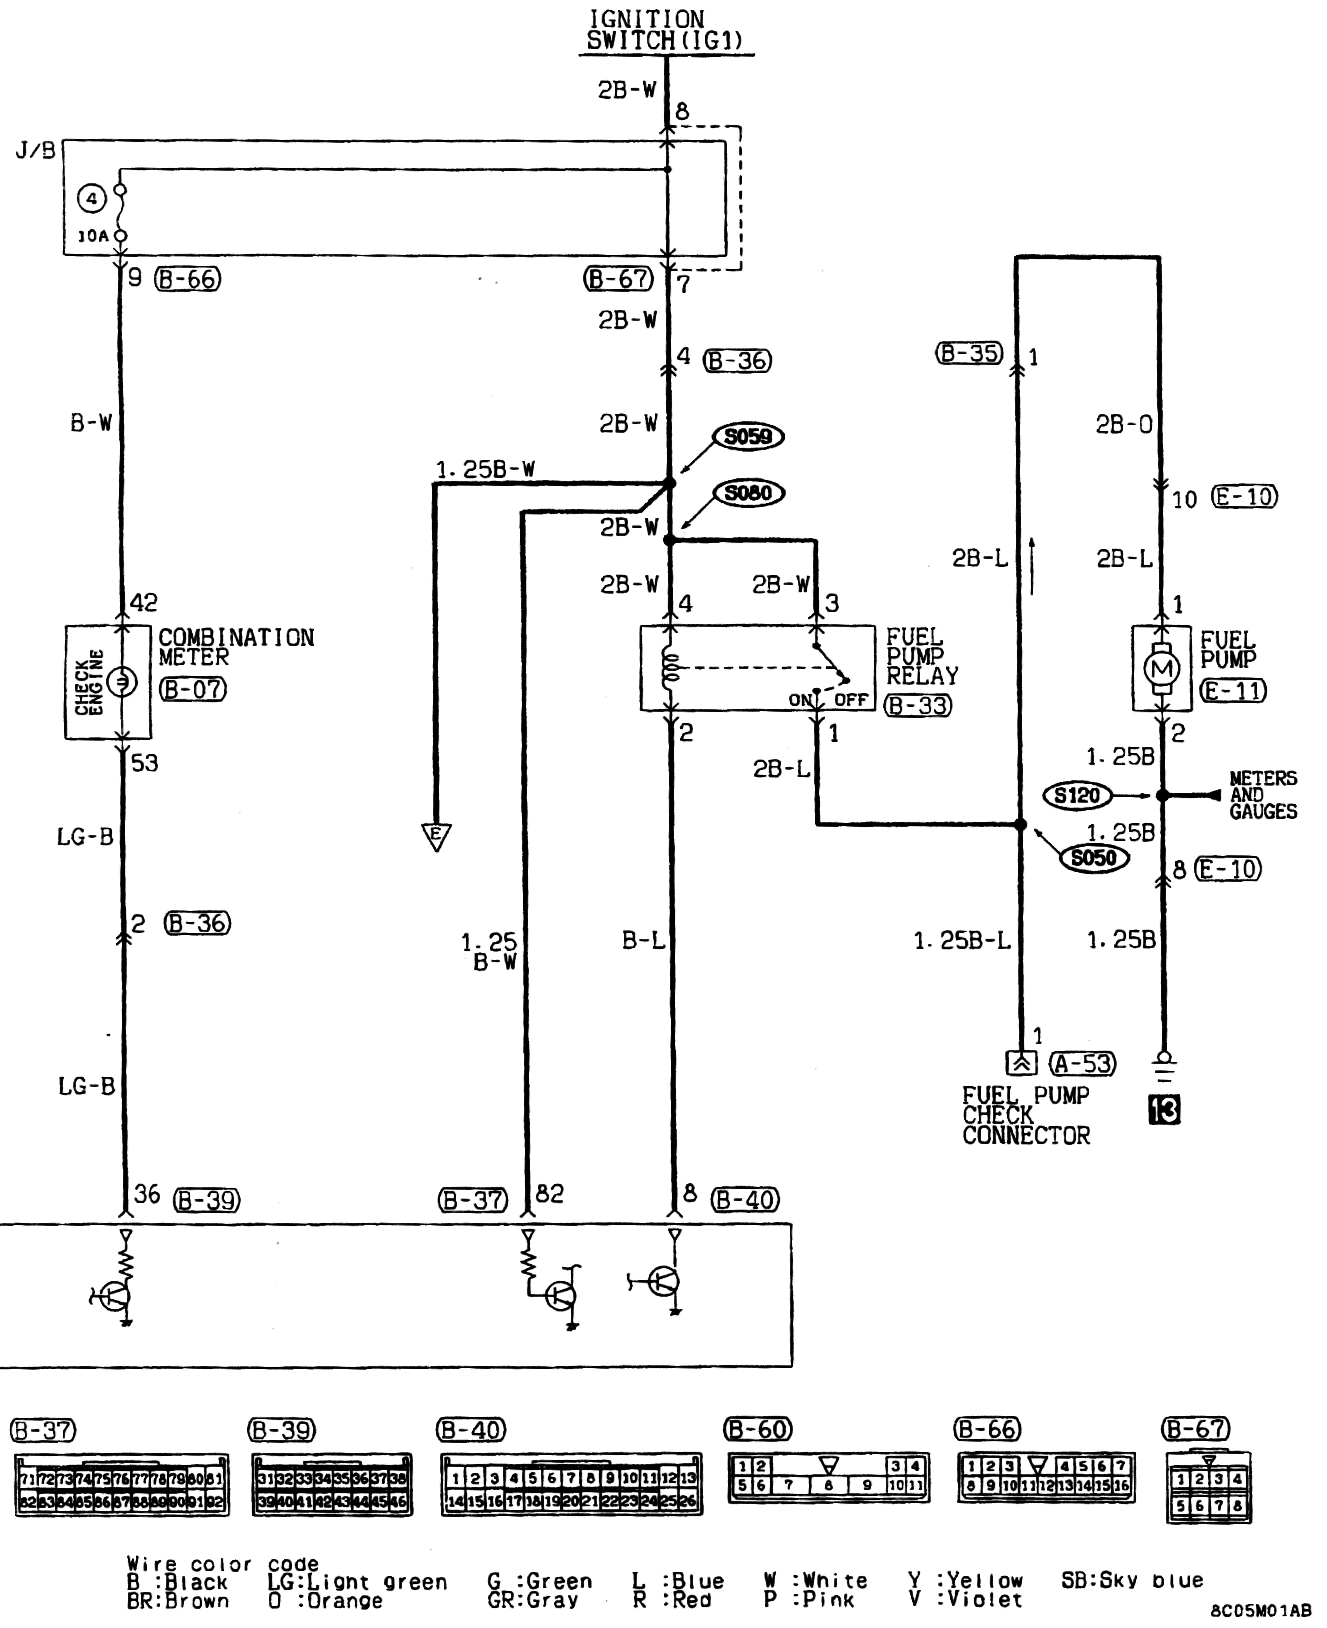
We were able to confirm that the fuel pump worked by connecting connector A-53 directly to +12V and hear it start.

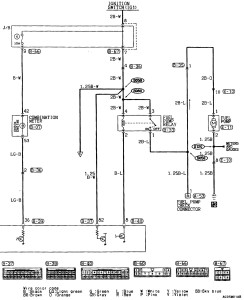
Next we turned our focus to the MFI (Mutiport Fuel Injection) system. Here is the electrical diagram.

elect_mfi

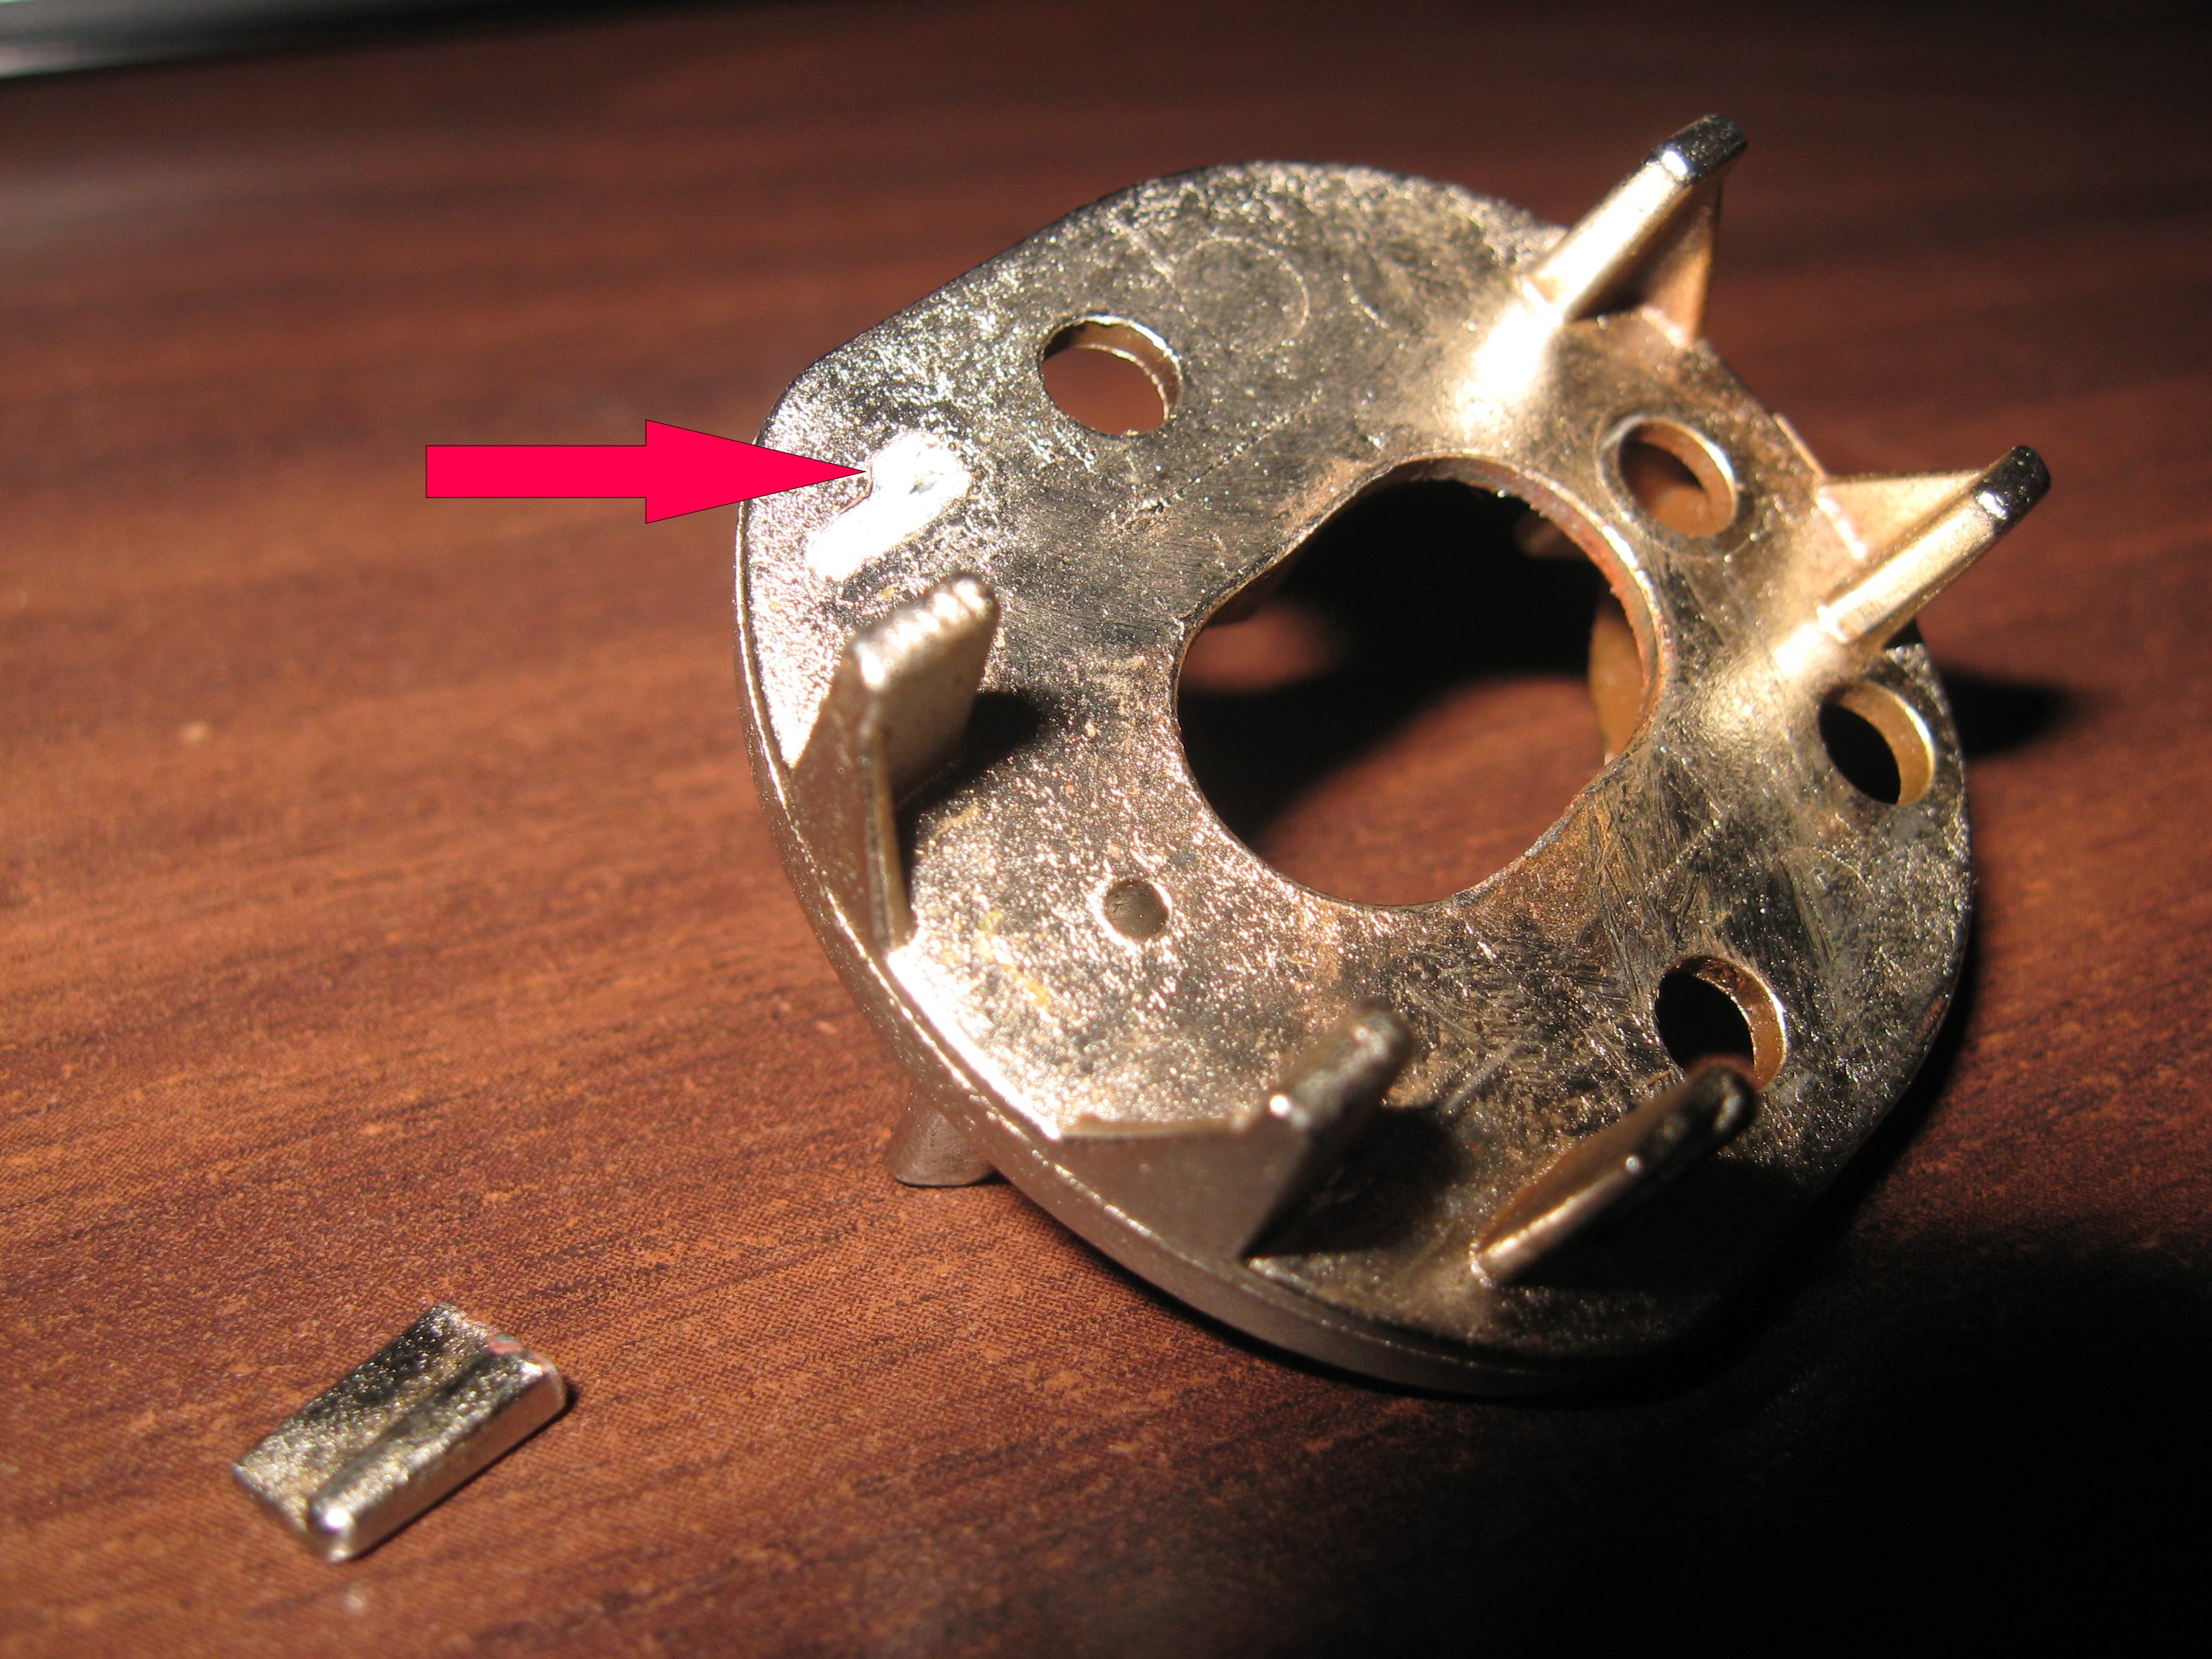
Starting at the top we checked for Fusible Link #7 and found that it was opened. We replaced the fusible link and the car started. So we had found the problem but not its cause, something made that fusible link melt.

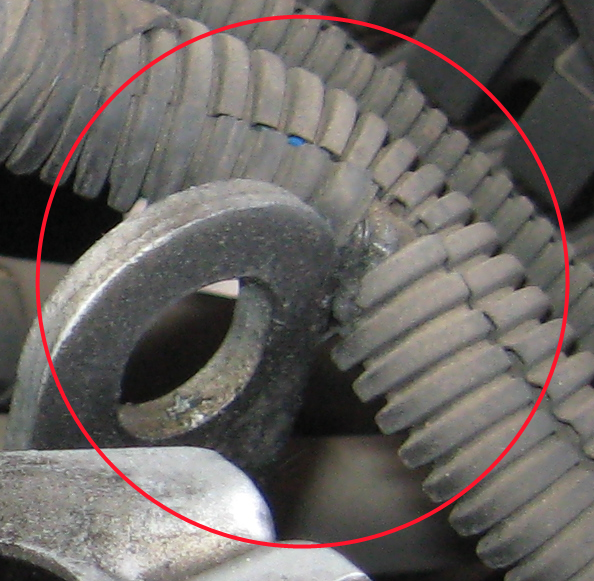
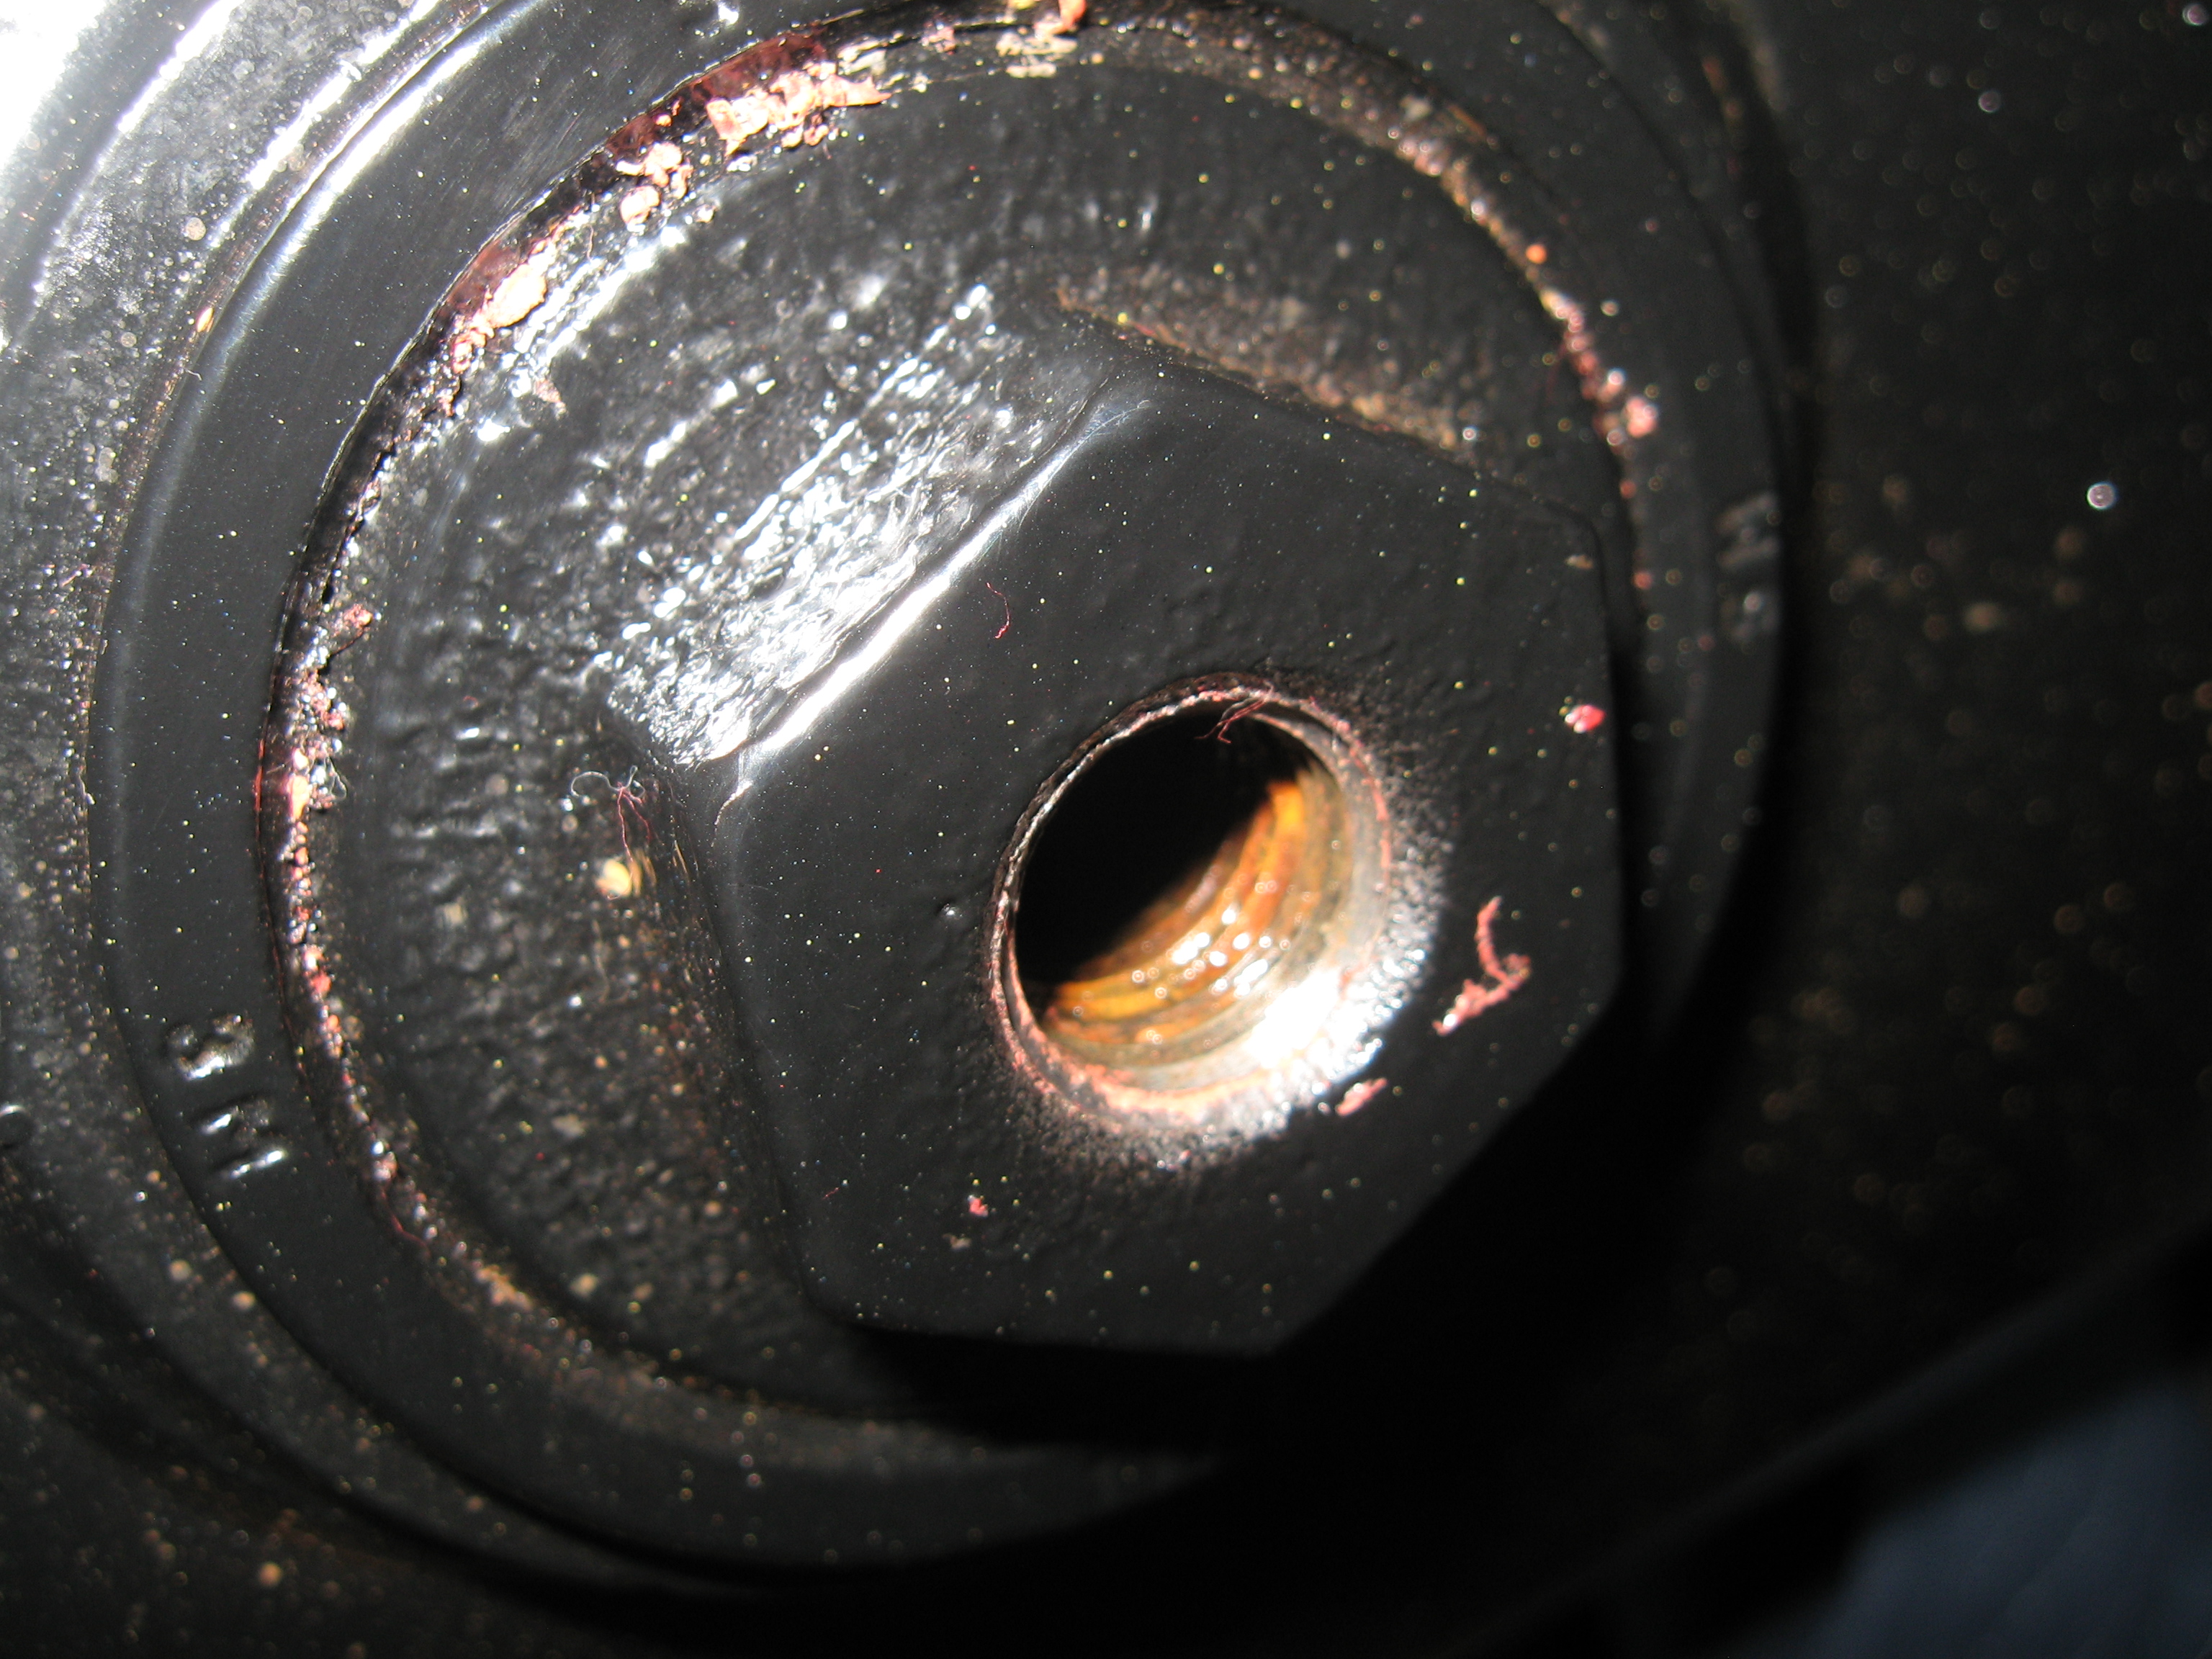
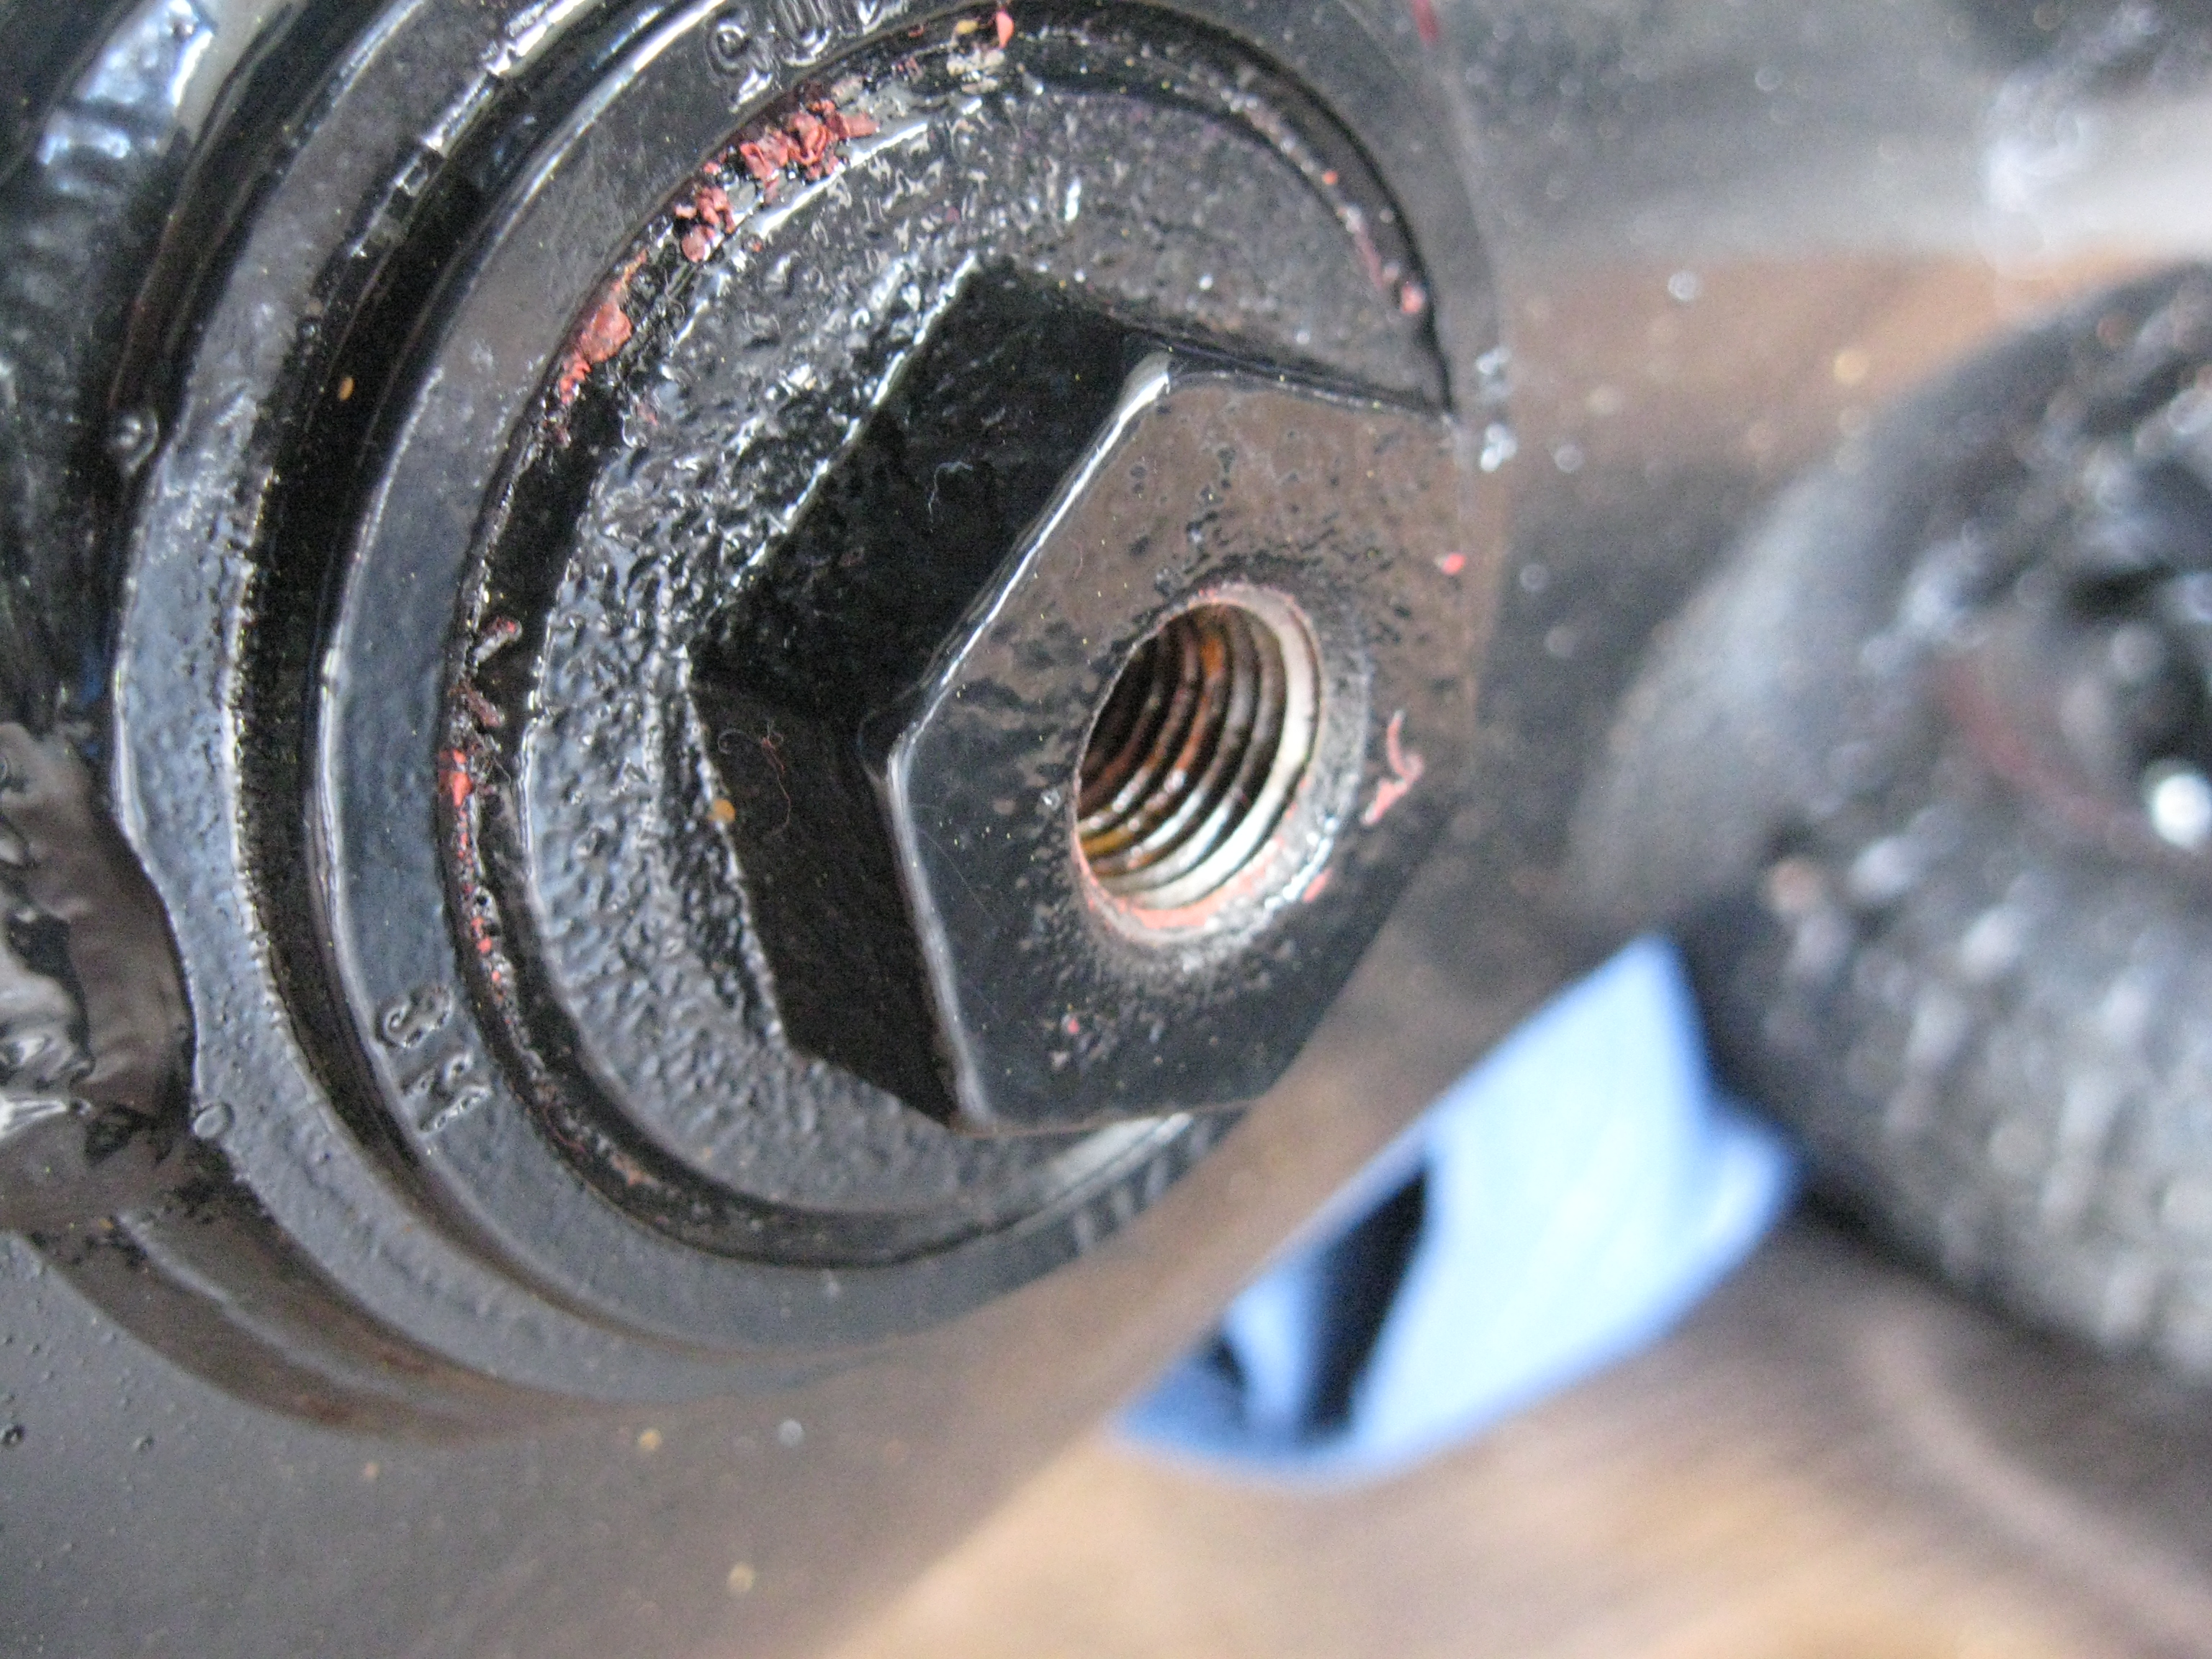
Since fusible link #7 deals with injectors and a few other sensors I decided to look around the wiring harness in the engine that were going to the fuel injectors and noticed that one of the wiring harness was rubbing against the engine lift bracket to the point that it had puncture the plastic protection.
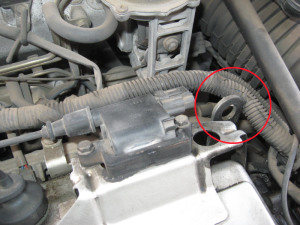
mitsu1

See close up:

mitsu2

Jiggling the wiring harness produced a few sparks (shorted to ground).

The culprit was found and repaired.

Genie ISD-990 Garage Door Opener
Lights stay on

Symptom: After the garage door closes the lights will not go out. Pressing the wall switch will not turn them off either.

Most likely solution: the relay controlling the lights is stuck in the closed position.

Here is the garage door opener, its internal parts exposed:

IMG_3189

There is a board for the I/O, remote (the one parallel to the ceiling) and one to control the motor and lights (perpendicular to the ceiling).

IMG_3183

Note where the blue and white wires connect on the board (those wires go to the lights).
You can the follow the traces on the circuit board to see which relay they go to.
The relay is a Song Chuan 801H-1A-C.

I bought mine at mouser.com and here is a link to the specification sheet (PDF).

Remove the board:

IMG_3302

remove the relay:

IMG_3307

and put the new one in.

IMG_3311  IMG_3303

Put the board back in the garage door opener.

Air Compressor
Drain valve replacement

I lost one compressor to a bad drain valve that I could not close after a few year and that I could not get out at all.

I like the new Craftsman compressor I got but the drain valve started acting up as well, not sealing well when closed, so after the warranty was over I decided to change it and make it easier to drain the compressor.

Step 1 is to remove the drain valve… some red thread locker was used. I had no problem removing it but you might want to use a torch to ease it up. Then clean up the threads a little.

IMG_3986 IMG_3987

Here are the parts I used (I simply went to HomeDepot for them – you might need different lengths of pipe for your compressor):

IMG_3988

Start putting things together. I used thread sealer for the connections.

IMG_3989 IMG_3990

I also used a hose so I direct the drain water to a small pan, instead of having it go on the floor and discoloring it.

IMG_3992 IMG_3991

And here is the drain valve I removed.

IMG_3994 IMG_3993

Tascam CD-RW700 Repair
Stuck at Welcome!

Problem is with a Tascam CD-RW700 standalone pro-audio recorder. Turn on the power and the unit gets stuck at the Welcome! message on the LCD screen and you cannot even open the CD tray.

Remove the rack ears and carefully open the unit, locate the power board (right hand side when facing the unit).

IMG_5912

The top part of the board handles audio I/O and the bottom part is the power supply to the various boards (the connectors are a good place where to check voltages).

IMG_5910 - Copy

In my case I noticed one of the capacitor (C07 – the black one) had leaked. I also decided to replace the CapXon cap (C02) since it showed a borderline ESR value.

Specs:
C02….4,700 μF(35V)
C07…10,000 μF(16V)

I replaced them with Nichicon branded caps.

IMG_5915

Close, start and enjoy!

Note that I did check the two resistors (R72 and R73) and they were good (desolder one lead to measure the resistance). They should be 470 Ω (1/2 W).

Additional photos:

IMG_6404 IMG_6398LCD board

1995 Ford Taurus
Trunk release not working

The problem is that pulling the trunk release lever does not open the trunk. The lever will move up a little bit and then it stops and you can feel resistance to any more movement.

This is what it looks like…

IMG_3976

First we pull up some of the carpet to remove two bolts:

IMG_3977

I then realized that I did not need to remove the mechanism, so bolts went back in.

The problem was that the lock mechanism was broken and the lock latch was closed, preventing the lever from moving up. Since we never use the lock, I did not care to replace or fix it.

Use a zip-tie to keep the latch open:

IMG_3978

Close up view:

IMG_3979

Then put a new handle to replace the broken one and the repair is done.

IMG_3980